
Are you going to clean up your Android phone or hand it over to someone else? This kind of task gets involved of file deletion, which is a common routine on Android phone, especially for those budget phones with small intermal memeory. From the technical view, a single tap of Deletion button won't do any help if you want to delete the files permanently on Android phone. We will elaborate more details in below.
Introduction: About Permanent File Deletion
All your personal data and settings are stored in the physical storage on each Android phone. You can save the data in database(like contacts, text messages) or a specific file type (photos, music, video). Why we emphasize the word "permanently" in here is that the file is still on the phone after tapping on the Delete button. Only the soft link to the file is removed and can not be seen visually. However, you can still pull off the delete data with the help of data recovery software, which you can find thousands of recommendations in search engines.
To permanently delete files on Android phone, you have to remove both the soft and hard connection to the file and we need additional software or steps to achieve the goal. We will share 3 different methods to do that.
Method 1: Use DroidErase to Permanently Delete Files on Android
DroidErase is an unique data erasing software developed by FoneMoz to permanently delete files on Android phone. It is backed by enterprise-level security algorithms to ensure the deletion is done completely and non-revisable. It will rewrite the physical storage occupied by the file you wish to delete several times with ramdon digits, making it impossible to be recovered by any means or any software. This is why we recommend this solution at first place.
In the following tutorial, we will take photo as an example. The steps are the same for other types of files. Please keep that in mind.
Step 1 – Preparation
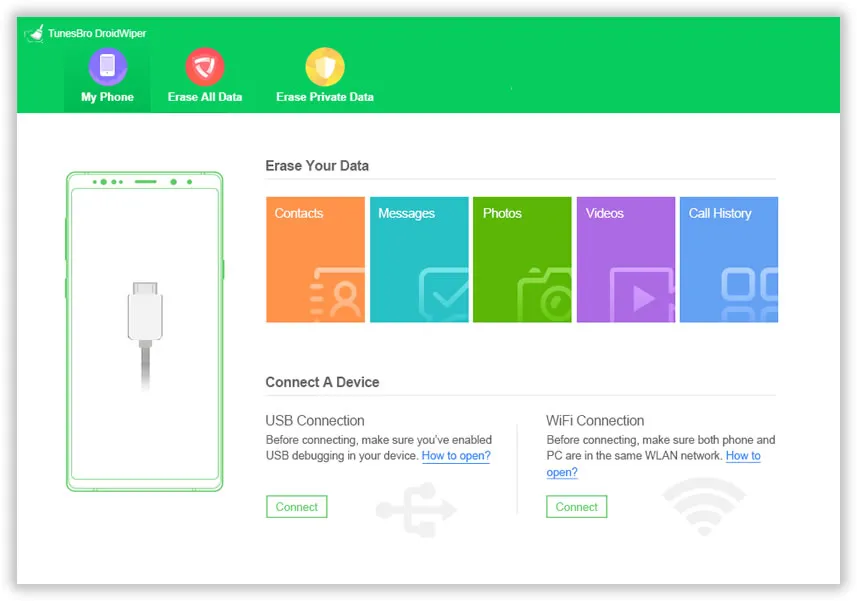
Download and Install FoneMoz DroidErase on the computer and meanwhile connect your Android phone to the computer using the USB cable. Once the installation is finished, launch the application.
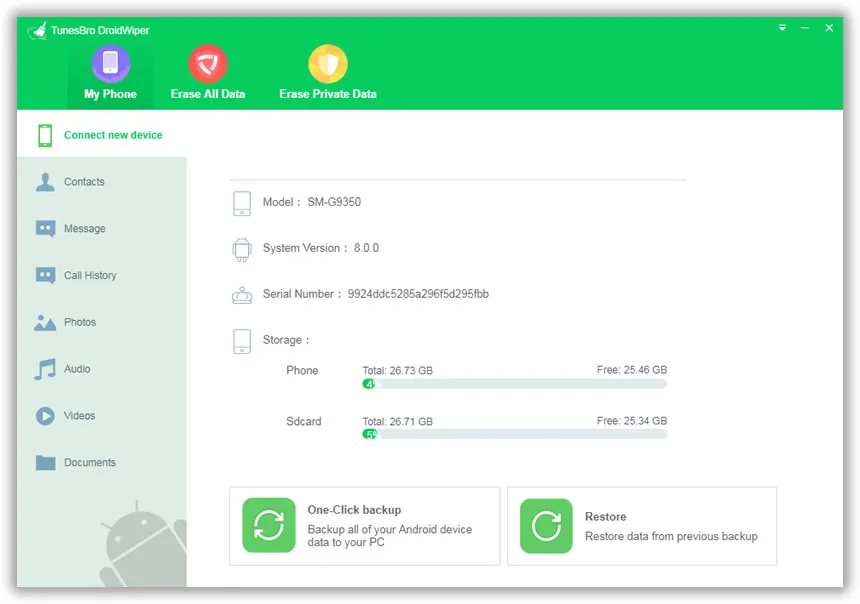
Step 2 – Show Device Information
On the main interface of FoneMoz DroidErase, you will get a phone icon only when the application detects the phone. If it does not, then reconnect the phone to the computer. Make sure USB debugging is enabled on the phone.
Step 3 – Scan Files on Android Phone
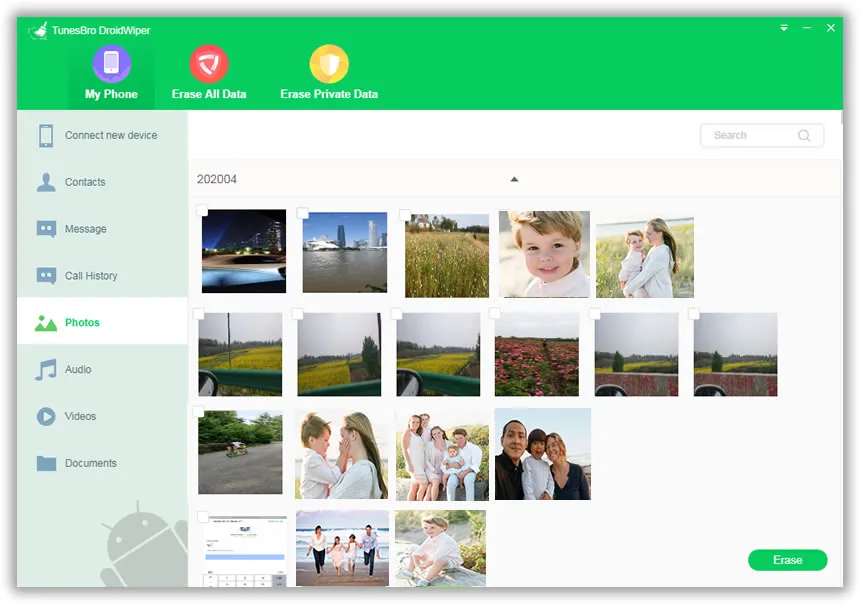
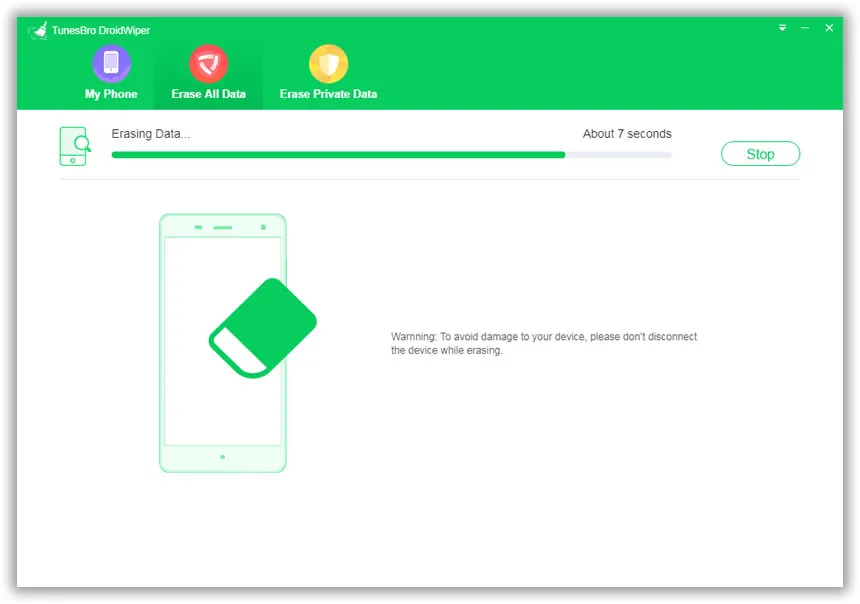
There are two data erasing modes displayed at the top to completely wipe the phone, i.e. Erase All Data, and Erase Private Data. Click on Erase Private Data. Now, the phone starts to scan all data and files stored on the phone. This should take a couple of minutes. Once it is done, you will see all of them are listed in category.
Step 4 – Permanently Delete Files on Android
Preview and select the photos you want to delete permanently. After that, click "Erase" button to start deleting photos on Android phone. If you want to modify the security level, then click on the Settings and then make the changes. Finally, wait for the task to be completed.
FoneMoz DroidErase offers ample erasing features to the users. Using this tool, you can even erase all kinds of data from Android phone. So, if you want to delete the files permanently from Android phone, then FoneMoz DroidErase won't let you down.
Method 2: Encrypt Phone and Delete Files Permanently via Reset
Android phone has a built-in feature for data encryption. The prime aim is to protect the data from being retrieved by advanced data recovery software. However, this is a full disk solution and will delete all of the files permanently on Android phone. Please be warned and backup your data first.
Encrypt Android Phone
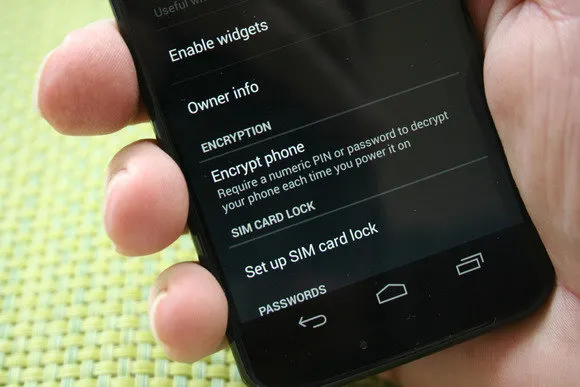
Step 1: Unlock Android phone and tap on Settings. Under the Settings section, you will get several options, tap on Security.
Step 2: In the Security page, you will get the Encryption section, tap on Encrypt phone. Now, you need to set a lock so that you can decrypt it using the password. To lock encrypt feature, tap on Set screen lock type located at the bottom of the security interface.
Step 3: Just after setting the lock screen the encryption process will start immediately. The processing time will take about an hour. So keep the phone idle and make sure that the battery is charged to 80% or above.
Reset Android Phone
The encryption feature has scrambled all the data and files on Android phone and now, you can perform the factory reset process to permanently delete files on Android phone. If you have a backup of important data, then proceed ahead.
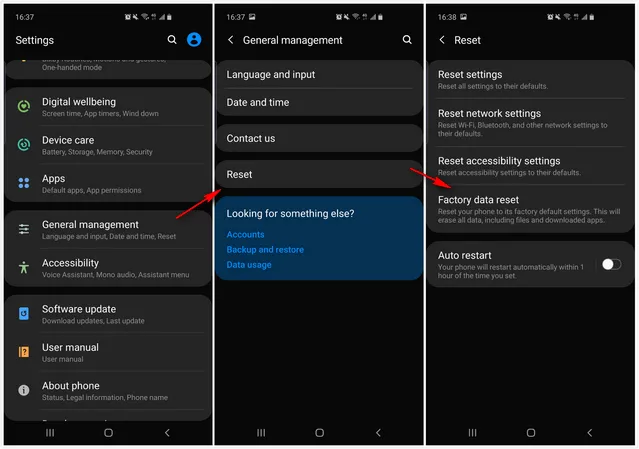
Step 1: Tap on the Menu button and select Settings from the featured list.
Step 2: Move to the Personal section and then tap on General management option.
Step 3: Under General management section, you will get Reset option. Tap on Factory data reset and further tap on Reset Phone.
Step 4: The reset process will take a few minutes and once it is done, your phone was formatted and no data is on the phone.
This is the simple and easiest methods to permanently delete files from Android phone. However, if you are in a doubt about the recovery of deleted files, you can upload the junk files on Android phone and then again reset the device. This action will overwrite the data and it will be hard to recover after the reset process. You can also complete the task with FoneMoz DroidErase for safety reasons.
Method 3: Permanently Delete Files on Android Phone via Find My Device
Find My Device is a Google service available on modern Android phone. This new feature helps the users to locate and erase Android phone remotely. This is also a complete and permanent file deletion solution for Android phone. On some phones, the name is called Android Device Manager instead of Find My Device, both are the same and have the same functions.
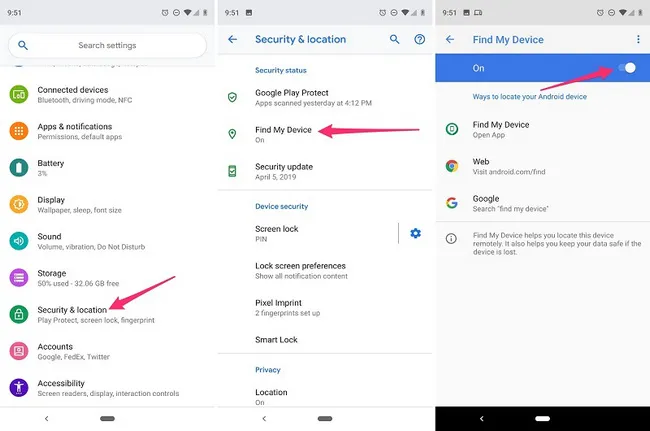
Step 1. Open Phone's Settings and select Find My Device or Android Device Manager.
Step 2. Here, you will get few options, tap on the radio button to enable the feature Allow Remote Lock and Factory Reset. Also, ensure to tick mark on Remotely Locate This Device feature.
Step 3. Now move to the computer, open the browser, and go to Find My Device website. On the landing page, you will be asked to enter Google account credentials.
Step 4. You will get a few options on the screen and you need to click on the ERASE button. Soon, the process will begin and once it is completed, your files on Android phone has been deleted permanently.
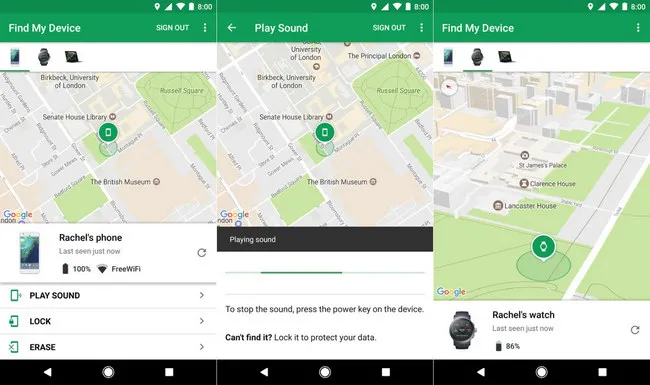
This method works with the internet which means your phone must be connected with an active internet connection. Moreover, if you had forgotten linking a Google account to Android phone, then you won't be able to use this method to permanently delete files on Android. So, these were the few limitations of the Find My Device method, rest it will do its job precisely.
Summary
The above are some of the most popular solutions to permanently delete files on Android phone. If you want to sell your phone, then it is recommended not to go with the simple factory reset method. At this point, you can trust FoneMoz DroidErase because it is more reliable and deliver the result much faster.
Android Transfer