
Junk files are the bane of Android phones, eventually slowing down your system to a crawl because of overutilization of space and memory. However, it also offers an easy way of speeding up your phones when you feel that it's running smoothly. Manual cleaning does help, but using tools to clean up Android phone is much easier and more convenient. There are basically two types of tools you can use to clean up junk files on Android: mobile apps and desktop apps. Let's look at how both these categories of cleaning applications work, and how to use them to clean up junk files on Android phone.
Manually Clean up Junk Files on Android Phone for Individual App
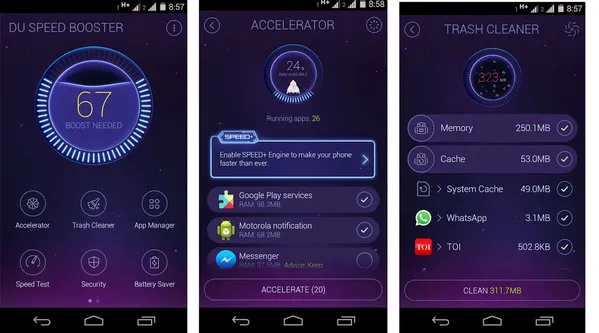
Cache basically stores all the frequently accessed data to be used in future. However, the cache avoids using the phone's hardware unnecessarily and saves time. And it becomes junk file and eat up free space when time goes on. This is why your phone starts lagging. Also, the memory displays a red signal indicating your device is running short of memory. Therefore, cache cleaning of every individual app is important on a daily basis. This method is meant to clear cache of each individual application of your Android phone.
Step 1: Simply, go to the device Settings app.
Step 2: Go to the Apps sections and check out each app in the list to find the ones that takes more space.
Step 3: Access each of the apps and further tap on their respective 'Clear Cache' option. This will free up a lot of space on Android.

Majority of Android users don't pay much attention towards Android cache cleaner. Whereas, it is the best manual way of removing videos and images downloaded from WhatsApp or other social media apps. This will help you to better determine the exact status of your phone functions and its features. Added to that, preventive actions including blocking automatic media files download from the messaging apps. Doing all these will ascertain you long-term security for your Android device.
There are several emerging Android cache cleaners that claim to improve and enhance the overall performance and memory space of your phone. Well, it is true to some extent. But, most of these cache cleaners are dedicated to erasing each individual app's cache.
How to Easily Clean up Junk Files on Android By Using Mobile Apps
There are some fantastic apps in Play Store that will root out and remove all your junk files, folders and other content. Most of them are free but may include in-app purchases for premium features. Usually, basic features like junk file cleaning are free. Here are some of the different types of junk files that can be weeded out by a typical mobile Android cleaner app:
* Temporary files
* App cache files
* Files that haven't been used for a long time
* Residual files left over after apps are uninstalled
* Browser cache files
* Language files
In many cases, large files and app cache file cleaning will be in a different category from junk files, but that just depends on how the app finds the junk. The basic approach that all apps use is to first scan your entire memory for all files. They will then identify anything that’s not required for the normal working of the system and the apps, and tag them as temp, cache and so on. The third step is to allow you to review the junk files and display the total memory space you can save by deleting them. Some app cleaners will also let you clean RAM by killing background processes, which is another thing that tends to slow down your Android device over time.
Although mobile apps are more convenient, they are generally unable to completely delete data in an unrecoverable manner. For that, you'll need a robust desktop Android device management software application. The way they work is explained in the following section.
How to Clean up Junk Files on Android Using Desktop Software
With most desktop cleaner apps, junk files are just one type of unnecessary files that you can remove to free up space on your device. Such software often contains additional modules for erasing, data backup and restoring, system recovery, transfer, switching and even rooting. Whatever software you choose, make sure it has a good reputation in the market and has been around for a few years. In this part, we will take FoneMoz Android Eraser for example.
FoneMoz DroidErase
- Quickly identify all junk files.
- Bulk deletetion mode available.
- Instantly free tons of free storage.
- Permanent deletion for all files without recovery.
- Support the latest Android 10 OS.
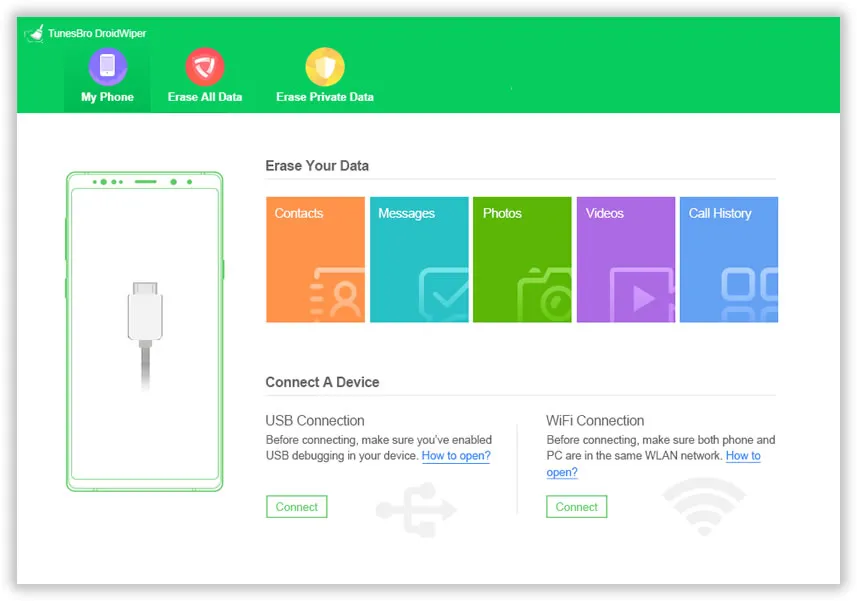
Step 1 – Download And Installation
The first step is to download and install the application to a PC or Mac and then connect your Android device. You may have to turn on debugging in most cases, depending on whether or not you plan to run other tasks.
Step 2 – Plug Android Phone into Computer
Once the app is installed and your phone or tablet is connected, launch the program and initiate the scan. This can take a few minutes depending on how much data you have on your Android device.
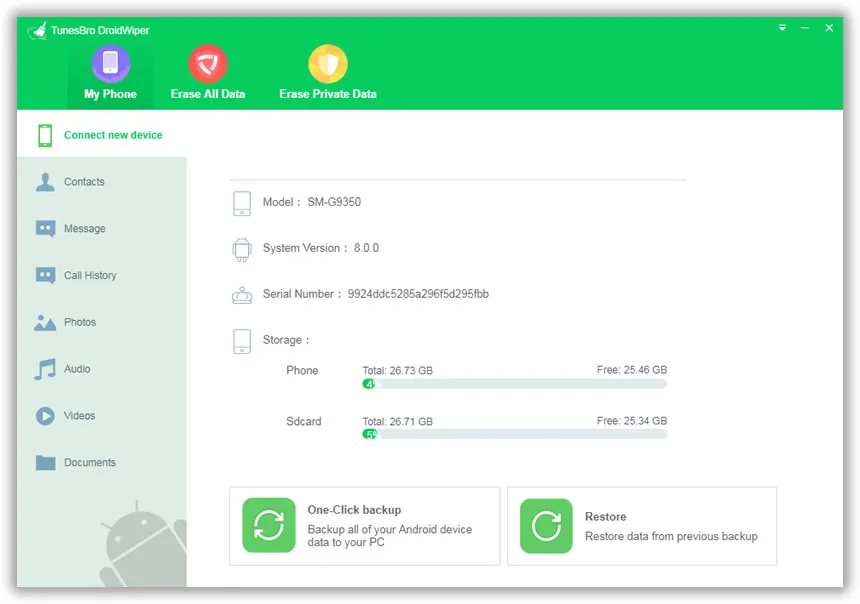
Step 3 – Scan Samsung Smartphone
After the scanning process is complete, you will be shown a categorized list of data types that are considered to be junk files and folders.
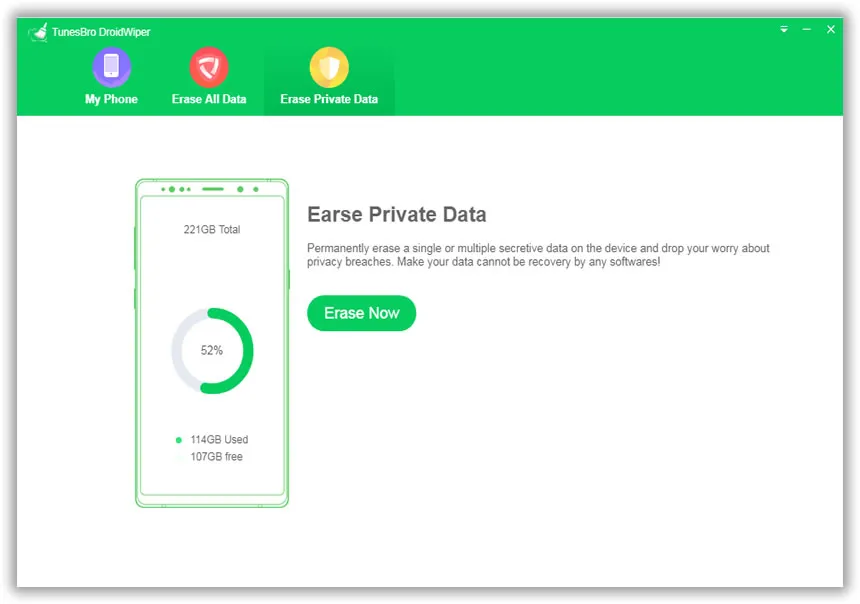
Step 4 – Clean up Junk Files
Once you review the list and select everything to be deleted, just hit the 'Erase' button. After the deletion process is over, you'll be able to see how much space you freed up.
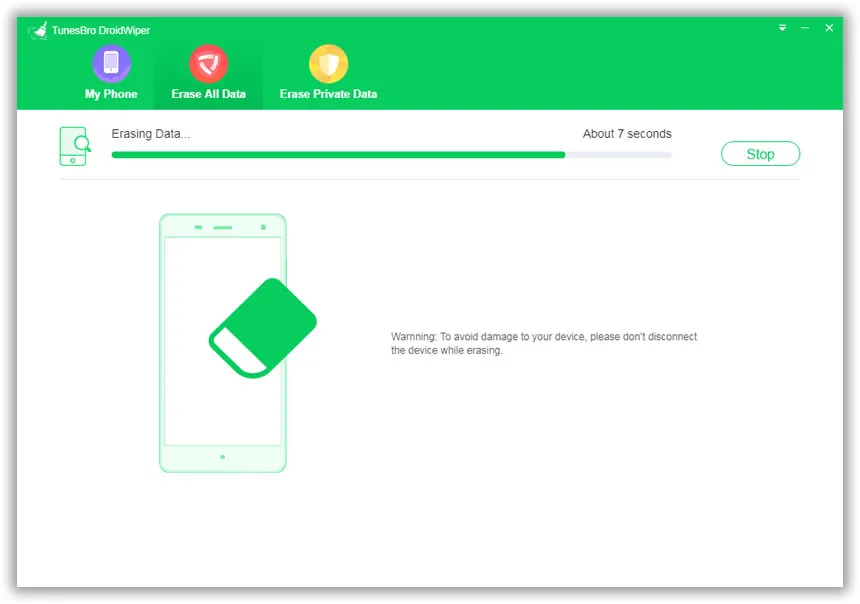
The more robust applications in this category will be able to completely delete all junk files, and you won't even be able to recover them with recovery software. That's why desktop applications are generally better for device memory management in Android. Normal deletion retains the data, but a thorough erasing process will overwrite it multiple times so nobody can retrieve it. Even your junk files are private, so this is the recommended option whenever you do your Android spring cleaning.
How to Permanently Clean up Junk Files on Android with Factory Reset
At times, factory reset is the final option left to format your device content and start over again. Again, doing a factory reset will take your device back to zero as all the settings will automatically get reset to by-default. That is, your Android device will be set to standard settings.
However, using a more recent Android device or an updated version on your device might keep the latest upgrades. For instance, if your device was running on Marshmallow or Lollipop and later got updated to Oreo, then your phone will continue with the same even after the reset.
This feature's primarily used for flashing ROMs on devices but equally handy for older devices. Plus it's a good idea to back everything up before doing this.
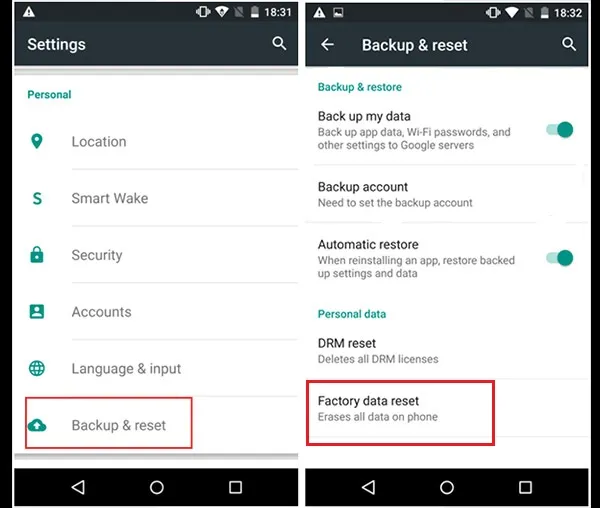
Here is what to do to restore your Android device to default stage by factory settings. Tap on 'Settings' and hit on the 'Backup and Reset' option. If you don't find this option under Settings then check it in the Additional Settings.
Well, it is that simple to clean the junk files and data from your Android system. However, if you are a beginner, then it is best to go with the second method to be on the safer side.
Summary
On a final note, make sure that the software you are using also gives you other options such as app data removal, large file detection, unused app detection and so on. The best ones on the market even have additional tools like app uninstallers, memory optimization, system optimization, file archiving and other useful features. The more features an application has, the more you can do for your Android device to keep it running like new. If your objective for cleaning junk files on Android is to get better speed and battery life out of your device, choosing the right desktop application for the purpose is critical. You might be spending a little bit of money up front to purchase the license, but it will serve you for many years as you upgrade your device to newer ones over a long period of time. Be wise and look at the long-term view rather than a quick fix. It's in your interest to do so.
Android Transfer