
It is a crucial step to keep your contacts organized when it has been a long list. If you add contacts from time to time on your phone then at a time, it will mess up your contact list. In that case, it is a time-consuming and tough job to delete unwanted contacts. Another scenario may exist that over the years, you keep replacing the phone but never cleared the contact list. You might get many duplicate contacts over the time In addition, if you plan to resell the old Android phone, then it is also recommended to wipe out all the personal data along with contacts to prevent it from misuse.
To solve the about problem, we need to delete contacts on Android phone regularly. Here we have share four different ways to erase contacts from Android phone temporarily and permanently. The final decision is largely dependent on what kind of situation you are in.
- Part 1: How Contacts Are Saved on Android Phone
- Part 2: About Contact Sync on Android Phone
- Part 3: Delete Contacts on Android Phone (Risky)
- Part 4: Remotely Delete Contacts on Android Phone from Cloud
- Part 5: Completely Delete Contacts on Android Phone (Best Choice)
- Part 6: Factory Reset Android Phone and Delete Contacts
Table of Contents
Part 1: How Contacts Are Saved on Android
Usually, if you want to save a new contact on an Android phone, simply go to Contact section, click on the + icon, provide the person's details and press the save button. You will be presented with two options to store the contact. One is phone's internal memory. In this way, the contact information is stored in a SQLite database. And it is impossible to view the details via file explorer because it is hidden from seeing in default.
Another way is to save the contact on SIM card, which has a very limited capacity (32K or 64K). This means it can only hold dozens of contacts. Plus, all the contacts could be gone if you lost the SIM card.
Part 2: About Contact Sync on Android Phone
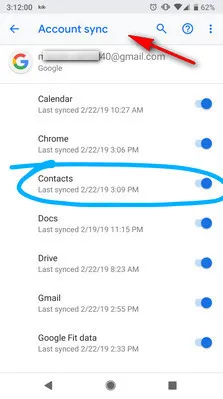
As an Android phone user, you just can not live without Google apps and services. One popular feature is contact sync, which moves your local contacts to cloud. This is a great way to protect your contacts when accidental deletion happens or something wrong with the phone. What's more, all the contacts will be synced to your new phone automatically once logging into the same Googel account. So if you enabled contact sync on Android and want to completely some contacts, then make sure delete it from cloud, too.
Part 3: How to Delete Contacts on Android Phone (Risky)
This is a completely free and convenient way to delete contact from Android phone. Each Android phone has this ability in default so the benefit is that you don't need to install third-party app or software to complete this task. However, it is not safe! As we stated in Part 1, contacts on saved in SQLite database. The deleted contact is still recoverable with some professional data recovery software. If privacy is not your concern, then you can go with this way.
Step 1. Open Contacts app on your Android phone.
Step 2. Locate the contact name you want to delete. You can do this with a single contact or multiple at one time.
Step 3. Click on the Delete button given at the right-top corner on your screen. Then the contact disappeared from the list.
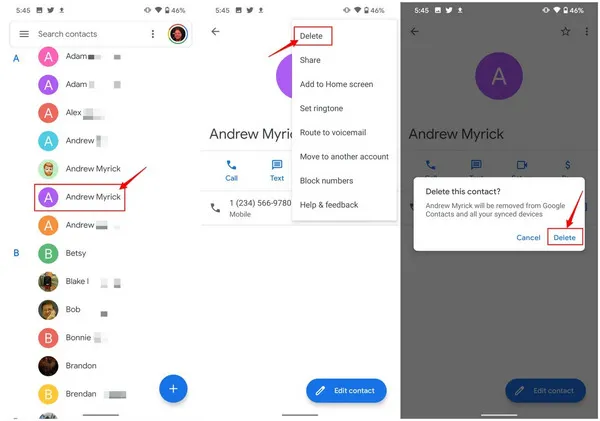
Note: In a few Android devices, you will get Delete option inside the More menu, located at the top corner of the screen.
This process is super easy but not secure. Because once you deleted the contacts, it will remain inside internal memory of your phone. And if in case, your phone goes in a wrong hand then the deleted contacts can be easily retrieved using some professional data recovery software.
Part 4: Delete Contacts on Android Phone from Cloud
Keeping a copy of your important data on cloud storage is always advised to be on the safe side. And many Android user are following the guidelines. When you want to delete Android contact completely, it is a must step to manually remove it from cloud service when contact sync is enabled on your Android phone. If not, the deleted contacts will be synced to your new device in default.
As Google Cloud is the most common used storage server on Android, we will take it as an example to delete contacts on Android phone from Google Drive. The steps will work for other cloud storage as well.
Step 1. Go to the Settings of Android phone and tap on the Cloud and Accounts option.
Step 2. Now tap on the Accounts and then turn off Auto sync data located at the bottom of the screen.
Step 3. On the same screen, click on each account and disable the sync option. Repeat the process for all those accounts which you want to prevent from accessing your contact details.
Step 4. Now go to Google Contacts page (https://contacts.google.com) and select the contacts you want to permanently delete.
Step 5. Click on the three vertical dots given at the top menu and choose to delete.

This method allows you to delete Android contacts from cloud after turning off the sync option. However, if you want to use Google Accountfor other activities but not for saving the contacts on Android, then you can add that account again and then disable auto-sync option for contacts only.
Part 5: How to Delete Contacts on Android Phone Completely
The above two methods only delete the soft link to target contact, leaving the possibility for data recovery. The deleted contacts will be gone forever once the physical storage being overwritten by new coming data. This could be hours or days on a large volume phone. In order to completely delete contacts on Android, we need some special software for help.
FoneMoz DroidErase is the only tool that is capable of deleting private data on Android phone, including contacts, text messages, call history, photos, music, videos and personal files. The deletion is permenant because it writes to the same storage multiple times, making it impossible to access the deleted data with any means. For safety reason, FoneMoz DroidErase is highly recommended for completely deleting Android contacts.
Step 1 – Get Prepared
Find a Mac or Windows PC and download FoneMoz DroidErase application from official site. Now follow the instructions to install it on target computer.
Step 2 – Connect Android Phone
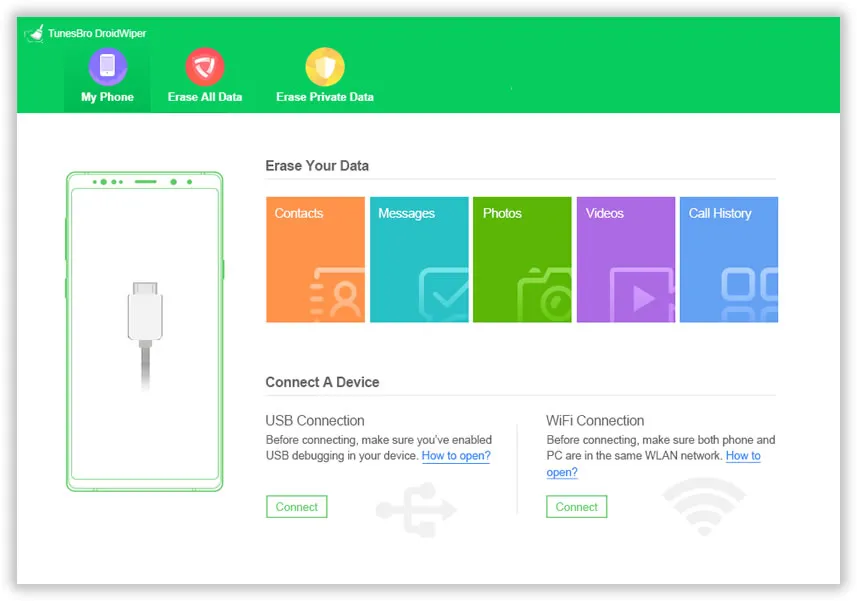
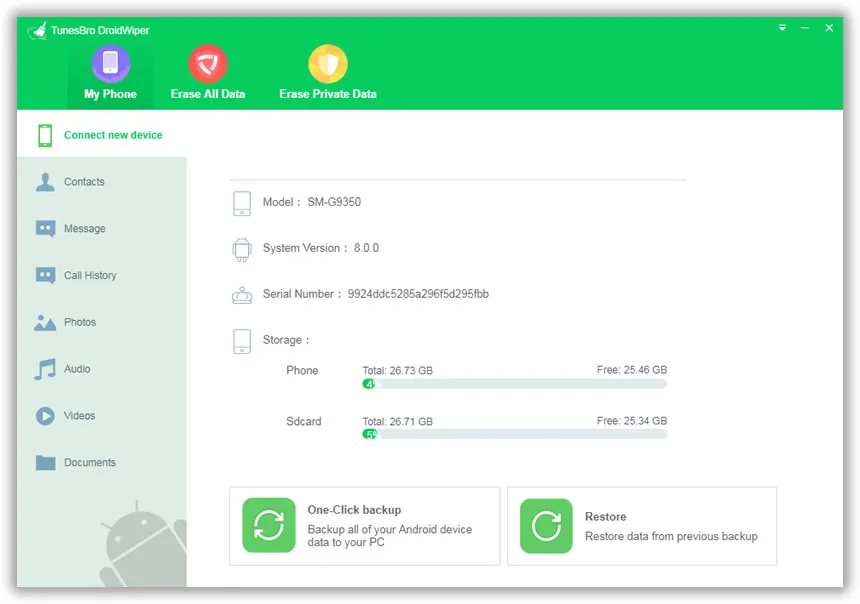
Now plug your Android Phone into the computer with a USB cable and turn on USB debugging mode on Android phone. After that, launch the DroidWiper utility in your computer and go inside My Phone menu.
Step 3 – Scan Contact List on Android Phone
Now click on the Contacts menu. This action triggers the data scanning process. DroidErase will try it best to find and list all contacts on Android phone from the user interface. You can see all of them displayed at the right side.
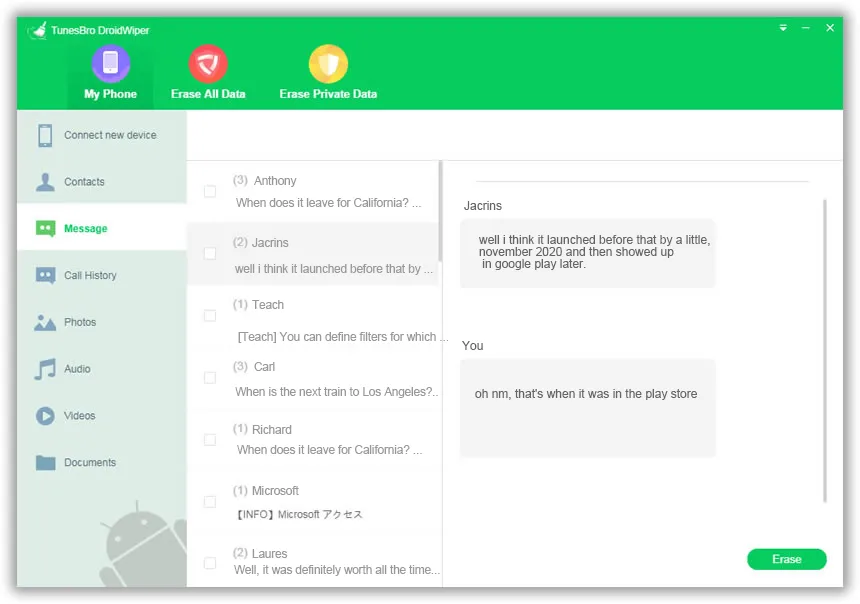
Step 4 – Select and Delete Android Contacts Permanently
Select all the unnecessary contacts from there. At last, click on the Erase button and it will delete the selected contacts permanently from Android phone.
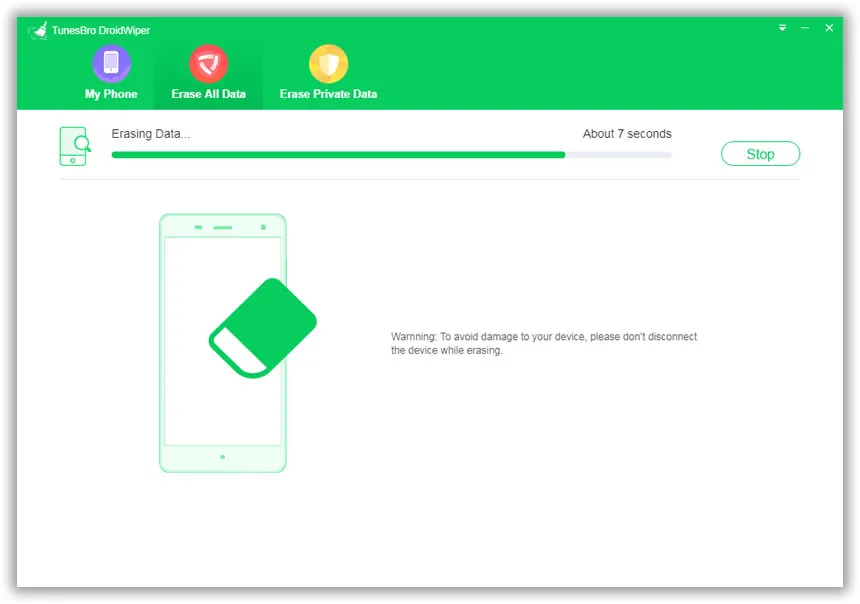
FoneMoz DroidErase is the most powerful tool to prevent your private data from misuse. It can delete Android contacts as well as other types of data on Android phone completely. The other reason is that the easy-to-navigate interface helps you to delete multiple or single files at one time without any hassle involved.
Part 6: Factory Reset Android Phone and Delete Contacts
If your Android phone is loaded with too many old contacts and other stuff or hanging frequently then it is better to factory reset your Android device. It will erase all the existing data (contacts included) on the phone and then make it like a new one.
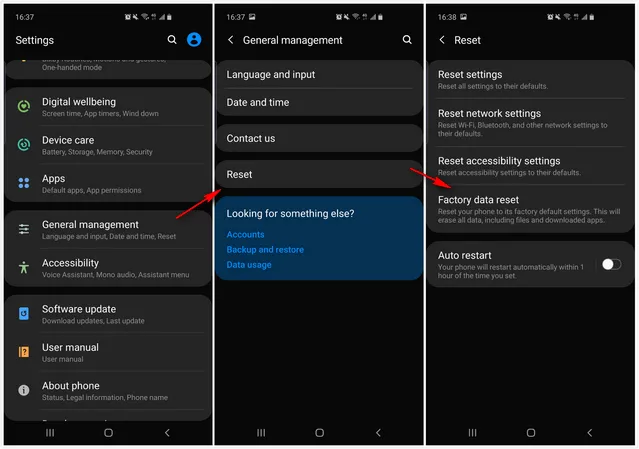
Step 1. Open Settings app on your Android and go inside General Management.
Step 2. Now click on the Reset option and from the next screen, choose Factory Data Reset option.
Step 3. It will show you the details which will be deleted after reset. Scroll down and click on the RESET button to complete the process.
Precaution: Before doing the Factory Reset of your device, make sure to take the backup of your important data.
Factory Reset must be followed as the least priority to delete contacts on Android phone. Because after reset, it will be a tedious job to download and install all the useful applications again and then make the settings as per your preferences.
Conclusion
Among all 4 methods listed above to delete contacts on Android phone, the first one is recommended to delete a limited number of contacts. The second method should be followed to disable the synchronization for auto backups of your contacts. The fourth method should only be performed if you are unable to operate your phone and there are no choices are left. However, we would recommend the third method i.e. FoneMoz DroidErase to delete contacts permanently from Android phone without any additional efforts.
Android Transfer