You simply cannot deny the fact that storing data on your phone is not completely safe nowadays, as your very own Android device is vulnerable to so many threat exposures. Like when you hand over your device to someone else, even though known; or you place the phone on charge at your room and move out for a while are some of the very common mistakes we often commit which end up with a huge mischievous conclusion. Isn’t it? Nevertheless, you can at least create a backup of your device contents to your PC, Cloud server, etc, or to somewhere which is not easily accessible by any random visitors since the zone is password protected.
There are innumerable such ways available to you, and now it’s up to you to choose the best amongst them to secure your Android data. Few of the competent methods are discussed here in this article, which if followed accurately will definitely yield the expected result.
Part 1: Backup Android Phone Utilizing Backup and Reset Option
Although you must have opened up your device settings many a times, but hardly have you ever notice the backup and reset options. The reason is quite plausible- you never needed it after all, right? Now here we are going to make use of the same option backup and reset to backup your entire Android data. Continue with your reading on how it performs the task:
Step 1. Switch on your device if it is switched off anyhow.
Step 2. Go to the app menu and tap on "Settings" app, which resembles a gear icon.
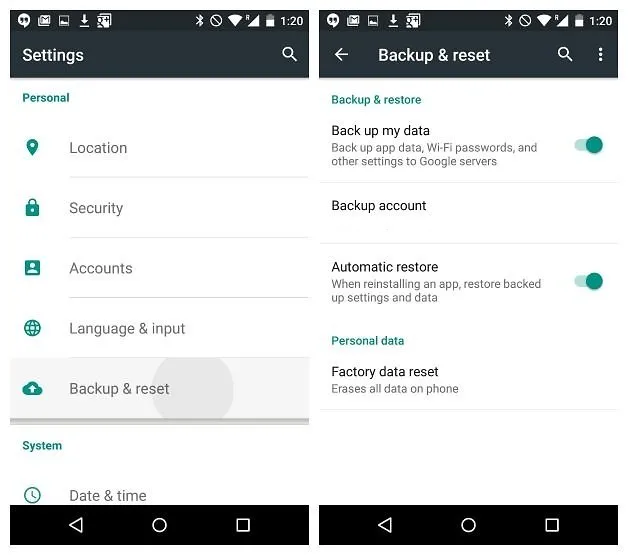
Step 3. After the Setting’s app opens up, there you will get to see a list of options from which you have to select "Backup & Reset" option by tapping on it. This option will actually enable you to backup your factory default apps such as Email, Messages, etc on your very own Phone.
Step 4. Now after tapping the Backup & Reset option again a list of apps are displayed on the screen. Here you have to select your very basic apps like clock, messages, email, etc.
While performing this particular step, you might be asked to login using your device account or the account associated with your service provider.
Step 5. Tap the "Off" slider to the right to turn "On" the "Back up my data" option and now you can select your apps that you wish to backup on your phone. You can also choose auto backup which backup your data automatically every 24 hours.
Step 6. Finally tap on "Backup Data Now" option which will commence the backup process. It might take few minutes so be patient.
Step 7. Now to restore your data you have backed up, tap on "Automatic Restore" from the Backup and Reset menu to do the job. This too might take some minutes to complete the loading.
Demerits:
- Since the data is backed up within your phone again, the potential risk is still a possibility.
- A smart phone user can easily restore the data by hacking your phone if the device falls into his/her wrong hands.
Part 2: Backup Android Phone & Tabet to Google Account
Google Account should be the main choice of backup location, but we often overlook out of momentary confusion. With this feature, you will be able to back up all content and system settings from your Android device to your Google account and restore backup information to your original device or a new device, but you can’t restore it to a higher Android version. Here in this section, we will discuss the procedure to backup the contents to the Google Account, from where you can retrieve the data at any moment of time.
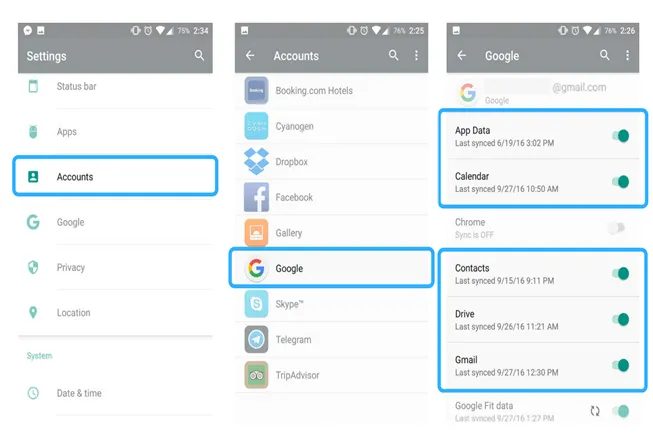
Step 1. Tap on "Settings" app from the app menu, and then select "Accounts" option from the list of options on the new page it ensues.
Step 2. From the new page of menu, tap on "Google" option.
Step 3. On tapping "Google" option, you will be displayed all the registered Google accounts of yours.
Step 4. Select any of the account from the list of accounts shown on the screen and tap on the icon adjacent to the Google account. This will automatically sync your apps to the Google Account you are currently signed into, and as a result all the apps will be backed up. Although the syncing must happen automatically, but still in order to ensure the up-to-date backup, tap on the refresh icon again and again.
Part 3: Backup and Restore Android Phone to Computer
Now here is something, you would dearly wish to apply before every other method, once you get to know its efficacy. Yes, the name is "FoneMoz Android Transfer". It is one of those incredible freeware tool used to backup and restore Android contents to PC, SD card, phone, external hard drive, anywhere. The versatility of Android devices it supports is no less than the best, whether it is Samsung, LG, HTC, Sony, etc. It could be able to detect your Android device and scan everything stored in your internal storage and SIM card. It has been nearly tested with all the Android mobiles, and the result is spectacular which verily proves the worth of using this tool. Before we head on with the procedure in real, it is better to know the tool in depth by reading the specifications listed out here.
FoneMoz Android Transfer
- Backup and restore your Android data on computer with one click.
- Transfer everything from your Android phone to computer and saver as text, html, XLS, and word format.
- Directly edit, add and delete contacts on PC and automatically synchronize to your phone.
- Install Android apps and organize apps conveniently.
- All kinds of data, be it SMS, Photos, Videos, Music, call logs, contacts can be easily backed up.
Compatible with Windows and Mac computers | Reviews (79+)
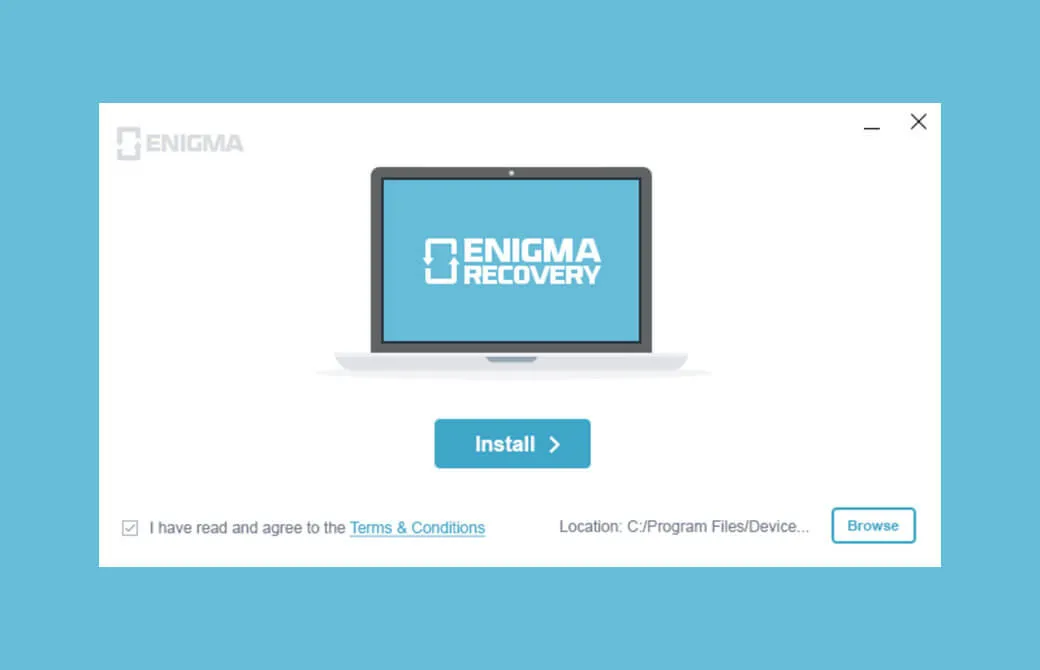
Step 1 – Download and Install Android Transfer
First of all download the software on your Windows or Mac computer and then install it properly. Here we will only limit our discussions to Windows PCs only. Then connect your Android device to the PC via USB cable.
Step 2 – Connnect Your Android to PC
You need to enable USB debugging on your Android device then open up the software and you will find your Android device detected successfully. The primary interface of the program will look somewhat like this.
Step 3 – Start to Backup Android Files
In the main interface, you should see the Backup and Restore button there, just click it and you will be asked to specify a save location for your backup file. Then select which type of data you want to back up.
Step 4 – Restore from Previous Backup Files
Restoring backup is also pretty simple, just click the Restore button on the main interface, and check the type of data you want to restore. Then the program will detect and load the backup files in the save path, then start to restore back to your phone. Rest assured that no data will be lost in the while process.
As you can see this program, it improves the functionality and utility for your Android phone, tablet as you manage, backup, restore, and control it through your computer. In case your personal data was lost due to accident deletion, corruption, or any other causes, you can rely of the Android transfer tool to backup all of your data.
Part 4: Backup Android Device with Backup App
Most Android users have already heard about Titanium Backup app, one of the most powerful backing up software. But the major flaw about this app is that it does requires a rooted device in order to function. Moreover, pro version is paid and you will have to purchase the premium version to take full advantage of this software. And you will have to purchase the premium version to take full advantage of this software.
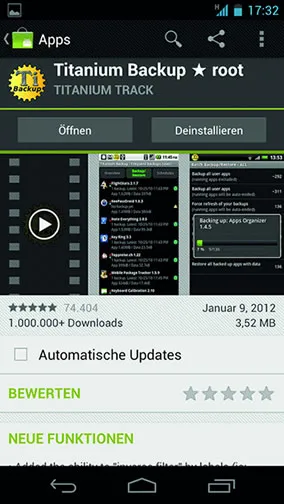
Step 1. Go to Google Play Store and install the Titanium backup app.
Step 2. Tap on the "Backup/Restore" tab and select "Backup all user apps."
Step 3. The app will automatically begin to back up the entire Android phone apps and if you wish to back up other file types then go through the respective folders and backup the files one by one.
You can later save the backup files on the computer and the restoring process is identical as well except you will be choosing the restore option that time..

Samsung Transfer